
Setting up an AI bot to automatically respond to customers
A new feature has arrived in Jivo — the AI Agent, which helps automate customer communication and resolve complex tasks without human involvement.
It will record the contact details left by the visitor in the chat, tag dialogs, and also analyze the customer's mood/sentiment.
In this guide, we will explain in detail how to set up the AI operator.
To connect it, you need to purchase the AI Agent module under "Extensions" > "Modules".
Contents:
- AI Agent Module
- Manual AI Agent Setup
- Adding Information for Responses
- Creating Instructions for the AI Agent
- AI Agent Knowledge Base
- Dialog Tags
- Chat Analysis and Customer Contact Logging
- AI Agent Knowledge Base
- Changing AI Agent Settings
- Tips for Organizing Data in Files
To configure, access the Jivo app, under Extensions > Options.

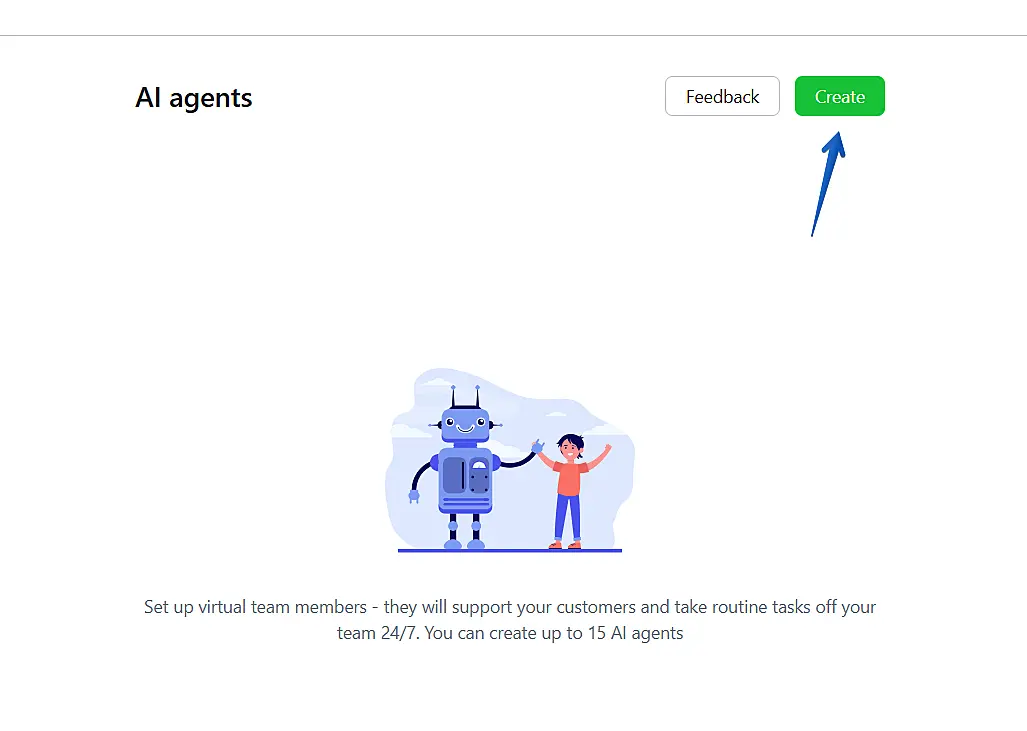
AI Agent Module#
Inside the AI Agent module panel, click Create. You can add up to 15 AI Agents.
Now, enter your website URL in the Website Address field and click Next Step to proceed.

The AI Agent will analyze your website content and automatically import all the necessary information.

Done! Note that the fields have been filled in automatically.

Review the contact list and click Next Step.

Enter the name of your AI Agent and the channel where it will handle customer service, then click Add AI Agent.

Your AI Agent has been successfully added and launched and is ready to handle customer interactions!

You can add documents to improve the AI Agent's responses about your business. Read the AI Agent Knowledge Base section for more details.
Manual AI Agent Setup#
You can proceed with the AI Agent setup manually by selecting the No website option and then clicking Next Step. In this case, all fields that were filled in automatically in the previous method will need to be filled in manually.

Adding Information for Responses#
In the next step, provide all the necessary data the AI Agent should use when generating responses.
Fill in the fields with as much detail as possible — this will help make the responses more accurate.
Provide the company name and contact details:
- Link to the website.
- Contacts: Phone, Email, Messengers.
- Address.
- Links to social media.
In the Details block, specify information useful for responses:
- Description of products and services (main names and prices).
- Delivery conditions (timeframe, cost, available regions).
- Payment conditions (payment methods and special terms).
- Return conditions (step-by-step process and deadlines).
- Other specifics (any additional information useful to the customer).
Creating Instructions for the AI Agent#
In the Details block, you can describe the AI Agent's workflow and operating logic.
Important: All instructions must be entered in this field only. If you upload them as a file, they will not be interpreted as a prompt.
The AI Agent understands Markdown formatting. This means you can use headings, lists, bold text, etc., to structure information and make it clearer.
Examples of instructions that can be configured:
Desired response format. Specify the tone and communication style.
Instructions for special cases. For example, logic for unusual situations or for handling dissatisfied customers.
How to answer common questions.
When to invite a human operator into the dialog.
Example: "If the customer asks about custom conditions, immediately invite an operator."
When to close the dialog.
Example: "If the customer confirms their question has been resolved, close the dialog."
When closed this way, the chat moves to Conversations > All and the data can be sent to your CRM via the "Chat finished" event.
When to request customer contact details.
The AI Agent can ask for a phone number and email and automatically record them in the dialog's information panel.
Practical examples of instructions are available in the article "Advanced AI Bot Customization: Using Custom Prompts".
AI Agent Knowledge Base#
In the Knowledge Base section, you can upload up to 5 files with additional materials to help formulate responses.
Examples of materials:
- FAQ (frequently asked questions and answers).
- Product and service documentation.
- Price lists.
- Branch contacts and addresses.
- Product usage recommendations.
- Legal information (policies, terms, contracts).
- Marketing materials (promotions, discounts, and special offers).
Accepted formats: .docx, .pptx, .csv, .html, .rtf, .xlsx, .xml, .md, .txt, .json, .pdf (max. 30 MB).
Click Upload, select the file from your computer, and finalize by clicking Add AI Agent.
You can later modify the settings, remove, or add new files.

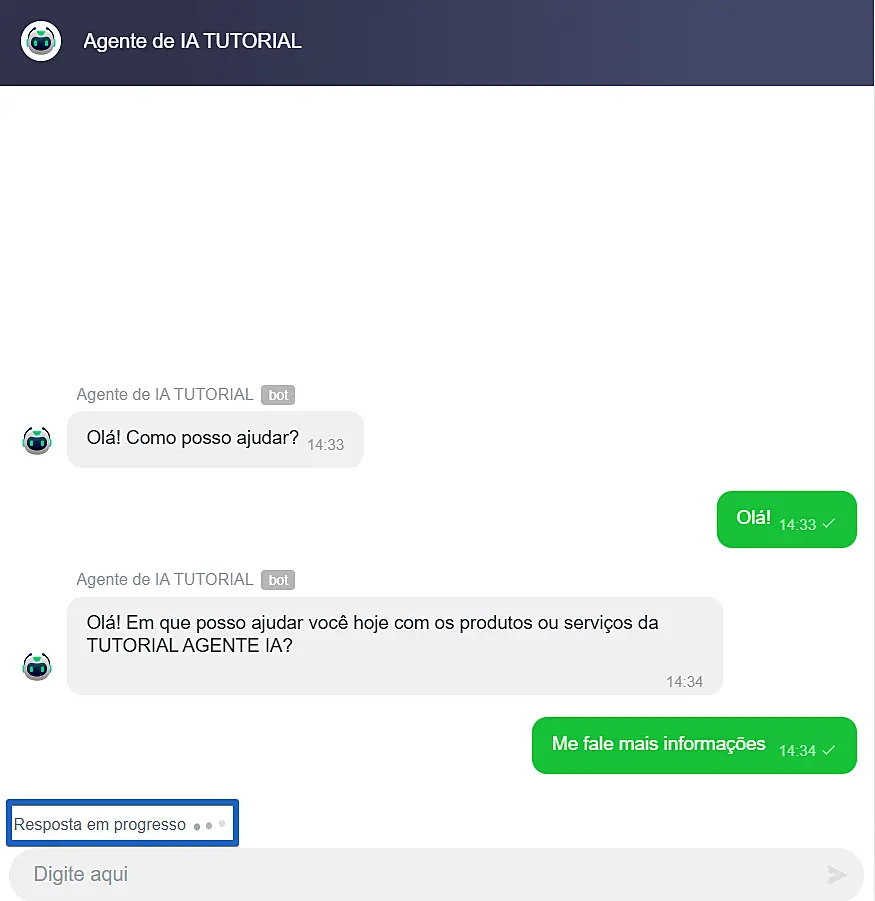
After setup, the AI Agent will be able to respond to customers according to the established rules.
While generating a response, the message "Response in progress" will appear in the chat.
It can also transfer the chat to a human operator, who will see it under Conversations > Inbox.
Tip:
Dialog Tags#
After the chat is closed or transferred to an agent, tags are automatically generated showing the topics discussed.
These tags are visible in the dialog's information panel in the Jivo app.
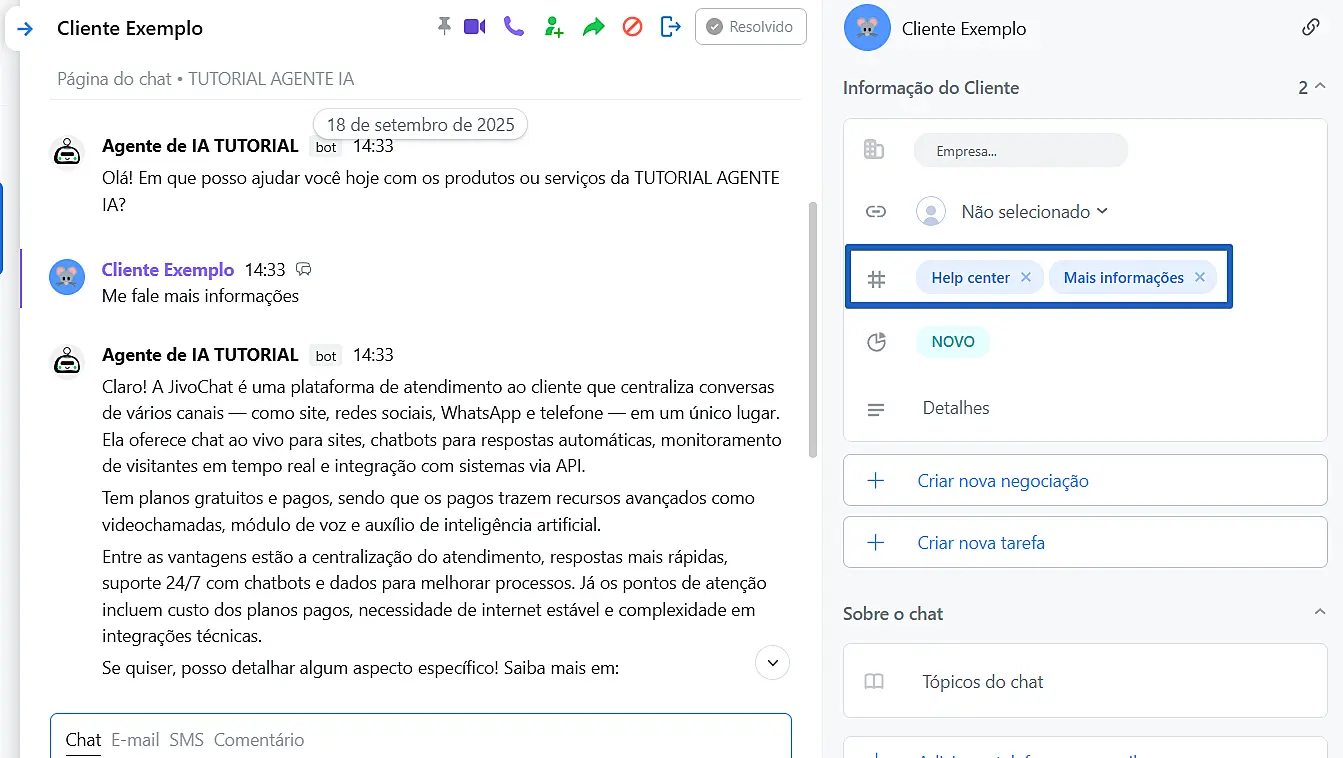
The AI Agent adds up to 3 tags per dialog.
If there are multiple chats with the same visitor, the total limit is 10 tags.
Tags are listed under Settings > CRM Settings > Tags, where they can be renamed or deleted.

Chat Analysis and Customer Contact Logging#
If the customer provides a phone number or email during the chat, those contacts will be automatically added to the chat's contact fields when the chat is closed or transferred to an agent.
If the contact already exists, it will not be duplicated. The AI Agent can save up to 10 phone numbers and 10 email addresses per visitor.
Additionally, the AI Agent performs sentiment analysis on the customer and generates a summary: main interests, questions asked, etc.
This summary appears under Conversations > All, in the AI Summary column.
Note: if the contact is provided after a human operator has joined the chat, it will not be recorded.
Changing AI Agent Settings#
Go to Extensions > Preferences. In the AI Agent Module section, click the Train button to access the AI Agent settings.
You can also pause the AI Agent by clicking Pause, without removing it from the channel.

Tips for Organizing Data in Files#
To help the AI Agent find information faster and keep your files organized, follow these tips:
- Structure your information: each line or paragraph should contain only one idea/data point.
- Use headings and sections to logically organize the content.
- Use descriptive file names (avoid generic names like "Data").
- Review files to eliminate errors and duplicates before uploading.
- Update files regularly to keep data current.
- Test the AI Agent after each update.
- In spreadsheets, fill in all cells and avoid merging them, as merges can hinder analysis.
Example in JSON format
[
  {
    "Country": "Brazil",
    "State": "São Paulo",
    "City": "São Paulo",
    "Store type": "Flagship",
    "Shopping mall": "Paulista Plaza",
    "Address": "Av. Paulista, 1000",
    "Opening hours": "Mon-Sun 10:00 - 22:00",
    "Nearest subway": "Brigadeiro",
    "How to find": "1st floor"
  }
]

